You would have seen from previous posts that I had already purchased a Volkswares rock 'n' roll bed. This meant that I would have to build the rear of the bed - this was the first thing that I focused on. I picked a weekend when my Dad would be around as he is a very handy gentleman with wood and other practical things AND, of course, I enjoy working with him!
I decided that we would work outside my brothers house. It was a relatively fine day (there was a brief shower) and the tools that I needed were all within easy reach.
Here's what we started with. I had removed the bed to give space but had previously worked out how long, high and wide the platform needed to be.
A trip to local builders merchant (Wickes) was needed to assemble the materials. I chose a 9mm ply and some 30x40mm battens for the supports and cross members.
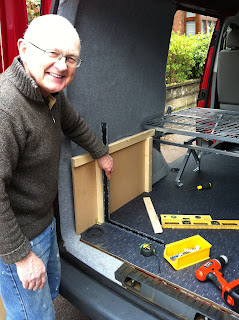
Here's my dad, smiling, he loves his son's projects :-)
A quick double check on the beds location was needed to ensure we got it right first time. (Measure twice, cut once etc...... I've learnt my lessons!)
I had prepared the side panels separately so we had a bit of a head start. The side panels were made from a 12mm MDF panels with battens glued and screwed on the top edge.
Here you can see the arrangement of the side panels as described above. We started by bracketing this support in place. A large set square was necessary as you can't really rely on a spirit level in a vehicle....
Naturally Dad got to work in following my instructions... hah hah!
We also fitted some vertical supports to take load down into the floor.
These were screwed in place to the side panels and then the side panel was bracketed to the floor.
The same was repeated on the other side of the van and four cross members were fitted to take the weight of the two adults that could be on the platform at any one time.
Even my Mam decided to get involved at this point. The next step was to work on the platform lid itself, this was made from two layers, a layer of 12mm MDF roughly shaped to the contours of the van followed by a more accurately shaped 9mm ply sheet.
This top sheet was screwed multiple times to the structure beneath leading to a very strong structure in the vertical plane. What it lacks at this stage is any kind of triangulation to prevent lozenging - this is covered later.
As you can see it is currently an open structure that will provide a lot of storage space underneath.
At this point we left it as it was starting to rain and we had a deadline to meet with a family meal to attend.


No comments:
Post a Comment