Sorry for the delays in updating the blog. I have been beavering away on more modifications to the van and only now am I finding the time to put some words and pictures online.
Regular readers will know that I am keen on making the van as sound proof as possible so that the driving experience is more luxury car than panel van. My latest focus has been to add insulation to the kitchen units, the engine bay and some other areas of the cabin.
 |
| Adding backs to the cupboards |
The cupboards were initially installed without backs so that opportunity was taken to add some 6mm ply backs and to also add some soft open cell foam insulation to help absorb any high frequency noise and to block out any knocks and squeaks from inside the cupboards.
 |
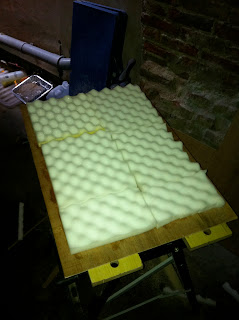
| preparing the panels for the foam insulation |
This was a fairly straight forward exercise using some open cell foam I bought in a job lot from ebay. I simply cut the panels to size and then used some spray adhesive to secure the foam to the rear of the panels
 |
| foam attached |
Another area of focus was the engine bay. I decided to use some closed cell foam here to ensure that it didn't absorb moisture or oil. The material was purchased from ebay and came with a sticky back, so it was a simple job of cutting, peeling and sticking.
 |
| attaching to the underneath of the bonnet |
 |
| Foam as delivered |
I also decided to add some foam to the engine under tray as a lot of noise if sent from the sump area of the engine and then reflects from the ground back into the cab. As you can see the under tray was incredibly dirty so the first task was to clean using a fairy liquid and water.
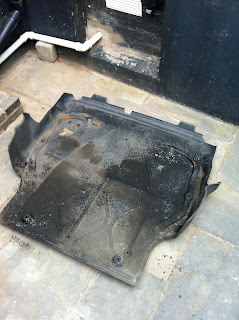 |
| under tray before cleaning |
 |
| under tray after cleaning |
 |
| under tray with soundproofing |
The last area of focus was the cab floor. This is a slightly longer task as you have to remove the seats. WARNING: please remember do this exercise on flat ground with the wheels chocked as when you remove the driver seat you have to remove the hand brake.
Once the seats were removed the flooring was also pulled up and flash band was applied to the entire floor area. Refitting the rubber carpet was a nightmare job, most probably because I didn't remove the lower plastic panel from underneath the gear stick..... (learn from my mistakes!)
 |
| Passenger seat removed |


