Monday 31 January 2011

Front Windows tinting - Tint R Nottingham


Didn't get much done on the van this weekend myself but I did employ someone to do a job for me!  Since getting the rear limo glass windows fitted I have wanted to do something with the front windows as they looked a little out of place.  I decided that I would explore the possibility of getting them tinted (a little).  I didn't have a clue how much it might cost, how long it would take or even if there was someone nearby that could do it.


Google came to my rescue and quickly identified a number of 'tinters' in the nottingham area.  My attention was drawn to the company Tint R as I have seen their distinctive stickers on a few cars around Nottingham.  A quick email arranged a 11.00am slot on a Sunday (I got a response within minutes from Richard who was off skiing at the time apparently!).


Tint - R Head Quarters


A short drive on sunday morning took me a to a small industrial estate in a Basford, Nottingham and the neat, clean and tidy workshop of  Tint R.  After backing my Van into the workshop Richard quickly got to work removing the interior trim of the doors and giving the windows a quick clean using some kind of magic solution.

removal of door cards

preparation work


I was then shown the various shades of tint that I could go for ranging from Limo tint to a very subtle barely noticeable tint.  I decided to for for a middle of the road tint which should keep the cops at bay.... lets hope so.

Tint R's experience showed with the efficient manner at which Richard cut the film to size and prepared the glass.  This is not the kind of thing I would like to do myself,  the possibilities for getting it wrong and trapping dirt are pretty large and apparently once you remove the self-adhesive cover and the transfer solution goes off this stuff sticks 'like the proverbial'.

Towards the end of the process


All in all, I would highly recommend Tint R if you are based in the midlands or, for that matter, anywhere within 100miles.  The service was very good, product excellent and the cost very reasonable.


The finished article


Before


After


Friday 28 January 2011

MPG and Aerodynamics

Regular readers of my blog will know that I am on the pursuit of more fuel economy.  I am an engineer by profession and have spent all of my working life involved with engines.  I have previously blogged about the engine mods I have done and/or planning but I have not told you about my thoughts with regard to other routes to fuel economy.

Did you know that the drivetrain consumes only 15% of the total energy to drive you vehicle , the remainder of the energy is rolling resistance (tyres) 25% and the biggest chunk is air resistance at 60%.  So if you are seriously about good fuel economy and are not driving around town all the time,  aero and rolling resistance mods are the way to go for big gains.

VW Concept car

I am now starting to do some research on this subject and will be scouring the web, my textbooks and picking my engineer friends brains to see what Bertha is going have done to her to make her use less fuel!

Heres a link to begin with

If anyone has done this kind of thing before on a Van (especially a VW T5) please contact me.

Cheers.

Thursday 27 January 2011

Permanent Installation of Garmin Nuvi 1690 Sat Nav Unit

I've just spent an hour or so installing my sat nav in a semi-permanent state.  What I mean by this is routing the power from behind the dash to where the unit is mounted and ensuring that the power only comes on when the ignition is on.

The first step was to ascertain the best place to get power from.  I scoured the forums for how people have done it before and the common theme I found was to take power from behind the headlight switch.  I presume that this is because that many people mount the sat nav on the right side of the vehicle, not where I wanted mine....  I have always been keen on a centre mounted sat nav, I guess because I normally need my co-driver Mrs Bertha to help input our destination or to adjust things while I'm carefully piloting the beast!  In addition to this I think that it looks better and more symmetrical!

I decided to do some exploratory work and started by removing the tray that is on top of the centre of the dashboard.  This is pretty straightforward to do, you just pull up and slightly towards you from the edge nearest the front of the vehicle.  Only pull up 20-30mm or so and then slide towards the front of the vehicle to free the lip nearest to you.

You will see that I have fitted the circular pad for mounting the suction cup already.
I also removed by Stereo and quickly identified with the help of my multimeter a ignition switched live wire and a suitable earth.


I then set about hacking apart the cigarette charger adaptor that came with the GPS.  The reason for this is that the unit is powered by mini USB which is at 5V suggesting that there must be a transformer within the adaptor.


I was right there was a simple transformer built into the adaptor.  I decided to solder wires to little circuit board inside so that I could easily splice them into the power source I found behind the radio.

Finally I drilled a suitably sized hole in the tray to pass through the mini USB and put it all back together.  Hey Presto, a nice a neat installation of my Sat Nav that stills allow for it all to the packed away when your parked up in a un-safe area!

hole for power source
Garmin Nuvi 1690 installed


Tuesday 25 January 2011

Installing Ikea Dioder lights

Hello.  I was asked via the T5 Forum to share how I wired the IKEA dioder lights into the back of the van.  So here goes.  It was not the easiest thing to do at the time but looking back with the knowledge that I now have it is pretty straightforward.

The instructions I am about to give detail how to remove the original lights and replace with one set of Dioder lights (4) and to have them come on when you activate the remote central locking and/or open the sliding side door.

Step 1

Remove the mains transformer but leave on the splitter box.  It is not required as you will be connecting to a 12V DC supply.  I removed by cutting it off with a wire cutters and then preparing the wires by removing a small about of insulation (should be brown-live and blue-neutral).  At this stage you may wish to fit the lights into the headlining - I replaced the headlining with 5mm ply.  (see images below)

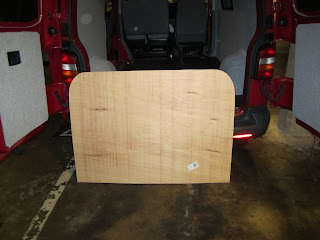
Replacement Headlining piece
Fitting of Dioder lights (just a few holes needed, no drama)

Step 2

The standard wiring in the rear of the van is essentially 2 circuits for the fore and aft areas of the rear of the van both with three position switches that are integral to the original fit lights


I decided to only use one of the circuits to power all 4 lights and as a consequence only insert one toggle switch and to compromise the complexity of the system.  The system I have wired means that only the side door activates the lights or the toggle switch itself.  This suits me as I rarely open the rear barn doors and if I need the lights on I will just flick the switch which I decided to locate just inside the sliding door on the roof (just out of reach for your head...)


So  the wiring is pretty straightforward.  The three wires going into the original light/switch unit above need to be removed and you will need some wire (I used speaker wire from Maplin which was black and white) and also a toggle switch like this.


Connect the brown wire on the IKEA Dioder lights to the wire that previously went to the centre of the original switch/light unit (It was red on mine as shown in the photo above)
You need to wire the blue wire from the lights to the centre contact on your toggle switch
Connect the other 2 wires from the original light unit to the other poles on your toggle switch

Heres a illustration of how simple it should be... (Apologies for the hand sketch which does not comply to any BS standard)

The - + - in the bottom right hand corner refers to the original wires on the light/switch unit fitted as standard (the ones you disconnected from the original light fitting)


Clearly you will need to extend the wires appropriately depending on where you put the lights and the switch.  Make sure you are careful to not short circuit anything and if it does not work check your fuses. Especially the 7.5A one that is unlabelled in the lower fuse box.

If your stuck, drop me a line!

Garmin 1690 Nuvi and Ecoroute - Update

Hello everyone.  I thought I'd post an update on how I am getting on with my new Sat Nav unit with its bluetooth OBDII connection.

I am very pleased with it.  At the moment I am using the device to get a good baseline on my Vans fuel economy before starting the modifications. At the moment the ECOroute tells me I am getting about 35-36mpg, however measuring tank to tank I am getting 41mpg.  Reading about this a little bit I have learnt that the ECOroute takes time to calibrate itself accurately and is corrected a little every time you use the "At the pump" feature to input your actual fuel fill in litres and the trip distance.  Being a little bit obsessive in this regard I have a stack of receipts and records of previous tanks and trip distances and have now entered those into the unit.

At the moment I am running the device off the battery and charging periodically until I can find the time to fit the device permanently.  In fact, just today I worked out how to disassemble the centre of the dash and the radio so that I can access a switched live. (I will post photos and a how to shortly)

I'll finish off todays post with some screenshots to show that the T5 IS compatible with the ECOrouteHD contrary to some forum posts that I have read.  I can confirm that it is easy to set up and a very neat, quality and well designed unit.

Garmin Nuvi in position showing the gauge view which is customisable

Close up the gauge view showing the dials you get.

MPG Screen

ECO challenge screen - good fun on a commute!

Thursday 13 January 2011

1000 Hits !

Just a quick note to say thanks for the 1000+ hits I now have to this Blog.  New posts are coming soon which will include more detail on the wiring for the Dioder lights, permanent wiring for the GPS/Diagnostic unit and some more carpeting work plus a whole lot more!

Thanks

Tuesday 11 January 2011

Garmin Ecoroute HD - Awesome realtime engine information

Hi All.  Im currently taking a break from working on the van and any kind of work infact.  However, I thought I'd update you all on the latest addition to the van- Ecoroute HD and Garmin GPS 1640 unit.  As an engine person I have ben keen to get information on the main engine conditions for some time.  I did consider retrofitting the standard VW engine computer but found that it would be extremely expensive as it involved a lot of time and money taking the dash out, sourcing the computer, scratching your head when it didn't work etc.  I had scoured the internet for equipment to get information from the cars OBD II (onboard diagnostic port) and there are a variety of units available many of them using bluetooth technology to relay the information to either your mobile phone or a bespoke display unit.

ECOroute HD Garmin


I decided after coming across the Garmin Nuvi range and their ecoroute technology that it was the best way to go.  I had been considering getting a new double DIN stereo with built in TomTom but decided that a seperate GPS unit was better (I previously have had a Porsche 911 and a BMW M3 with GPS and found that their built in GPS technology is out of date within a year to 18 months anyway).  Also the Garmin Nuvi range is very slimline and can be installed very neatly on top of the T5 dash.

So, the decision was made and I put the Garmin 1690 Nuvi on my Christmas list and purchased myself the ecoroute.

NUVI 1690


The setup of the GPS unit and ecoroute is very simple.  All you need to do is connect the ECOroute bluetooth adaptor to the OBD connector under the dashboard on the drivers side and run through some simple setup steps on the GPS unit.  Within 2 minutes I was out for my first test drive!

VW T5 Transporter OBD II Port


As written in previous blogs I am an engine engineer by profession and I am keen to continue to optimise the MPG of my T5.  I do a lot of miles everyday back and fro to work.  The ECOroute will serve as a good tool to monitor the effect of the modifications going forward.  I intend to blog about the improvements in the T5s MPG going forward.  So far I saw a 2-5% improvement from the blanking off of the EGR circuit and a expected gain in transient performane (acceleration from standstill etc).  Next steps will be to improve volumetric efficiency of the engine through some modifications to intake, exhaust and breather system.  My final plan is to get the vehicle remapped - most probably by Pendle performance.

Generic screenshot of Garmin ECOroute


When I get some more time I will show how I have installed the Garmin Nuvi 1690 GPS and Ecoroute HD unit on a permanent basis on the dash.

My current fuel tank average is 40MPG over about 6-7 tanks was 38 before blanking off the EGR,  I think Ill get another 8-10% through the modifications I plan to do.

Thanks for reading!